Why “Dzua”
Every homelab starts with a question: what if my home network could do more? Mine turned into a multi-week project I call Dzua, the sun: a full rebuild of my home infrastructure covering compute, networking, storage, security and monitoring. Its sibling is Mwezi, the moon, which you’ll meet below as the VLAN that carries my hi-fi.
This post recaps the journey: what I built, what broke, what I learned and where it’s headed. If you want the starting point, the plan and purchase post covers why I chose this hardware.
The Hardware
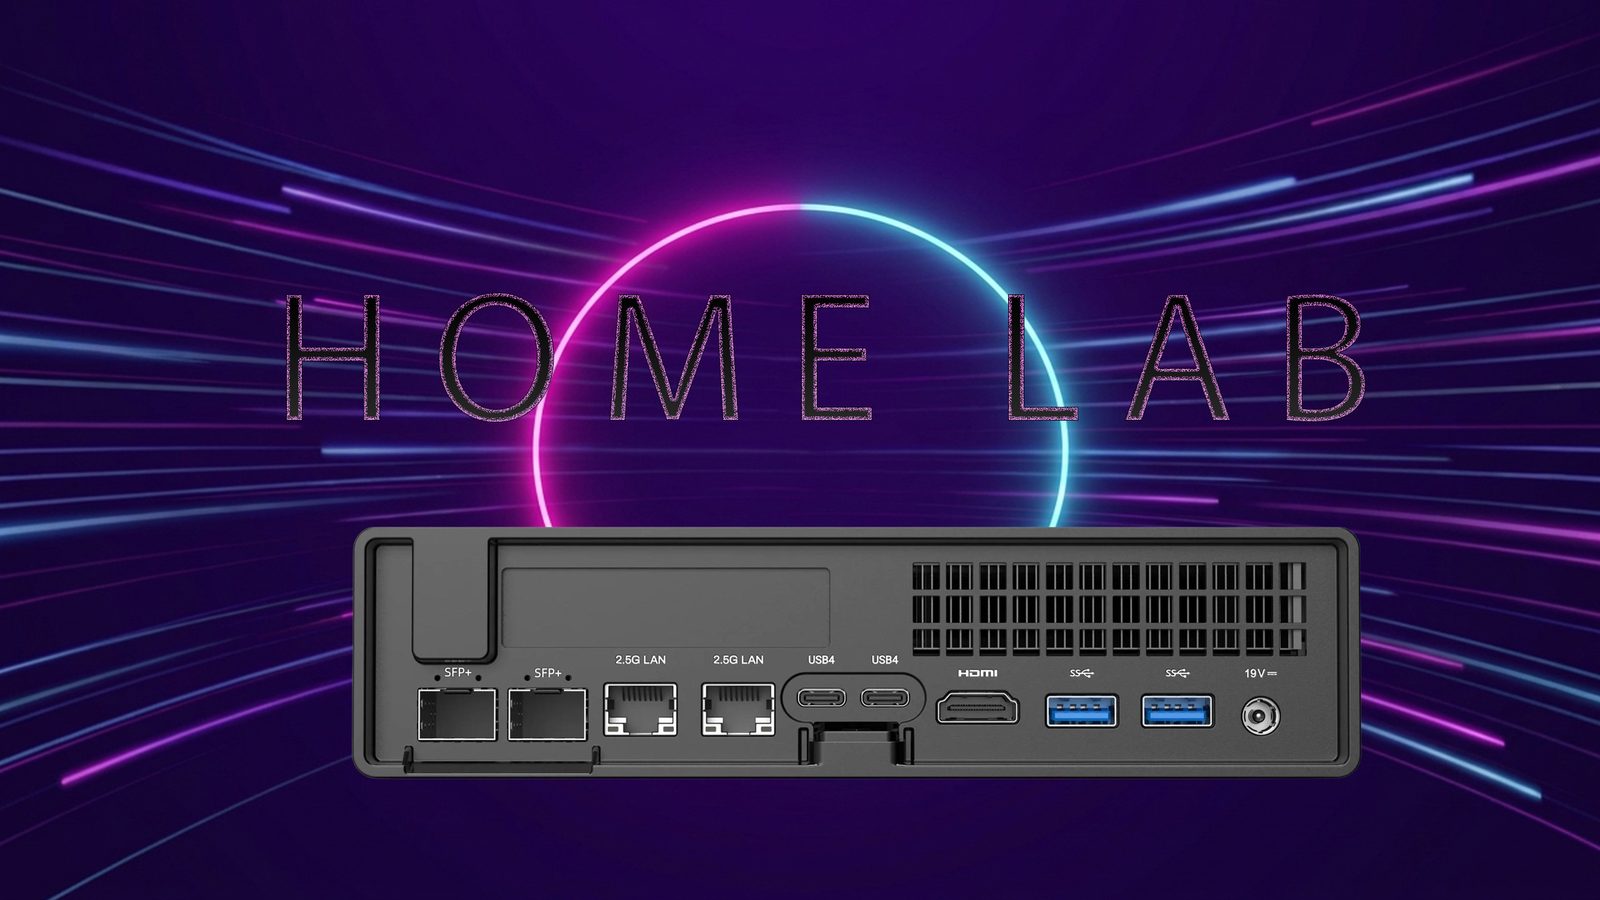
At the center is a MINISFORUM MS-01 mini PC (Intel i9-13900H, 64GB DDR5), which I ordered and had brought in via freight forwarder. It runs Proxmox VE and carries everything that followed: virtual machines, containers, monitoring, DNS filtering and more.
Alongside it sits a MikroTik CRS304-4XG-IN, a compact 10GbE switch, connected via SFP+ for a proper high-speed backbone. My Mac Studio joins at 10GbE too, so file transfers and backups that used to take a while now feel instant.
Storage is layered: a small NVMe drive dedicated to the Proxmox boot volume, a larger NVMe as the primary datastore, and a secondary NVMe rounding things out. Nothing exotic, just enough separation to keep the boot volume clean and the data drives fast.
The Network
The network is the part I’m proudest of. It’s built around five core VLANs on a MikroTik router, with RADIUS authentication for wireless clients, plus a separate segment for the Windows lab described later. Each VLAN has one job: a workspace network for my daily-driver machines, an isolated hi-fi VLAN (Mwezi) for my Roon setup so streaming and control traffic never touches anything else, an IoT segment, a guest network, and a management VLAN for the infrastructure itself.
Firewall rules are deliberately narrow: traffic is allowed where it needs to be and dropped everywhere else by default. It’s more work upfront, but every exception is intentional and documented, not accidental.
What Runs Where
The Proxmox host carries a mix of lightweight LXC containers and full VMs, each with one job:
- Local NTP via a small Chrony instance, so every device gets consistent, correct time from a source I control, with no dependency on the Raspberry Pi that used to fill this role.
- Network-wide ad blocking via Pi-hole, sitting in the DNS path and filtering live traffic (I tested it: blocklisted domains resolve straight to
0.0.0.0). - A monitoring stack: Grafana and InfluxDB, pulling metrics from the Proxmox host, every VM and container, and the network switches via SNMP.
- A SIEM: Wazuh, doing vulnerability scanning, file integrity monitoring and log aggregation across every endpoint I could reasonably enroll: the Proxmox host, my Mac and the various VMs.
- UniFi networking, migrated from an older Docker-based controller to Ubiquiti’s newer, more officially supported UniFi OS Server on its own dedicated VM. It was a clean rebuild restored from a full configuration backup, not an in-place upgrade, so nothing was lost.
- A Kali Linux VM with a full remote desktop, for hands-on security testing against my own network, which is much easier to justify when it’s your network.
Home Automation
Home Assistant runs as its own VM on the IoT VLAN, where it belongs, and has become the hub for the smart-home side of the house. I brought a varied mix of devices under it: RGB smart bulbs, an IR sensor that ties the AC unit and the Naim preamp into the same automations as everything else, and the outdoor cameras. Devices that used to live in four different apps now live in one place, on one isolated segment, with one consistent set of automations.
Remote Access
Reaching the network from outside is handled by Tailscale running as a subnet router. Instead of punching holes in the firewall, it extends a private, encrypted mesh to wherever I am, and narrow firewall rules decide what a remote device may actually reach, starting with the Home Assistant dashboard. It’s the kind of remote access that doesn’t keep me up at night.
A Proper Media Server
Partway through the project I put an idle Thunderbolt storage enclosure with three NVMe drives to work as a three-way RAIDZ1 pool (it survives a single drive failure) and built a Jellyfin media server on top, with an SMB share for populating the library and DLNA/native app streaming to the living-room TV.
The one real wrinkle: Thunderbolt devices must be explicitly “authorized” before the host will use them, and that authorization doesn’t survive a reboot by default. Power interruptions are common where I live, so the pool, and everything depending on it, would silently vanish after every outage until I fixed it by hand. A bit of systemd work later, the host waits for the drives, authorizes them and imports the pool on every boot.
Real Certificates, for Free
Every internal service used to mean either a “not secure” browser warning or manually trusting a self-signed certificate on every device, which is annoying at best and a bad security habit at worst. The fix is a free wildcard TLS certificate from Let’s Encrypt, issued with DNS-based validation that never requires exposing anything to the public internet. It sits in front of a small reverse proxy that now serves most internal dashboards over browser-trusted HTTPS with short, memorable names. Renewal is automatic.
Not every service ended up behind the proxy. One routed better going straight to its own address, for reasons that became a debugging story of their own (see below).
Centralized Logging
The SIEM only knew about machines running its agent. The router and the core switch, which can’t run one, were invisible to it. Both now forward their logs over syslog into the same central pipeline. Getting there took a detour through a corrupted config file and a file-permissions mismatch that quietly took the logging service offline for a few minutes. Copying config files in and out of containers is worth double-checking.
Keeping the Lights On, on Purpose
Power cuts are a fact of life here, so the UPS stopped being an afterthought and became proper infrastructure. The battery was swapped once it started resting well below a healthy voltage, and the monitoring moved: instead of one NAS watching its own power supply, the compute host now owns the UPS over USB (using NUT) and orchestrates a graceful shutdown of everything it runs once the battery gets low.
Extending that visibility to the NAS was a rabbit hole. Its built-in UPS client looked like it should just work, and a live handshake proved the network path to the monitoring service was healthy, yet the connection kept failing. The built-in client speaks a vendor-specific variant of an otherwise open protocol, so the real thing being reachable never satisfied it. The wider ecosystem of unofficial add-on packages had also long since dropped the device’s CPU architecture, which closed the alternative. The fix was to stop asking the NAS to listen and let the compute host do the talking.
What did come together is real-time UPS telemetry (battery charge, load, input voltage, status) flowing into the same Grafana dashboard every 30 seconds. The obvious collector had quietly dropped support for this data source in its official builds, which I only discovered after a plugin-not-found error that had nothing to do with anything I’d typed. The fix was smaller than expected: a short script reads the UPS’s own status tool and forwards the numbers on a timer.
A second UPS, protecting a separate workstation, was its own detour. macOS already has a built-in view of the UPS plugged into it, and both it and NUT want exclusive ownership of the same USB connection. Rather than disable a security feature for a nice-to-have, I read the number macOS already shows and forward charge percentage and power state to the same dashboard, tagged separately. Less detail, but one glance now covers both.
Pulling the Plug on Purpose
A shutdown plan you’ve never exercised is a hope, not a plan. The policy: on a power cut, wait 20 minutes on battery, or react sooner if the UPS itself calls low battery, then shut everything down in order. The compute host handles its own guests, and a small notification hook handles the two machines that can’t be NUT clients: the music server gets a one-line web request telling it to power off, and the NAS gets a restricted SSH login that runs Synology DSM’s own graceful-shutdown command. Along the way, a classic: the hook runs as an unprivileged service user, so SSH keys sitting in root’s home did nothing until I moved them somewhere that user could read.
Then the real test. I shortened the timer to 60 seconds, pulled the power and watched. The music server and NAS powered off, every VM and container stopped cleanly and the host followed. Everything that was supposed to go down, did. The timer went back to 20 minutes afterwards.
The test also turned up two honest loose ends. The host sat idle for about a minute and a half after its last guest stopped, which is dead time I still need to explain. And the UPS cut its outputs at a moment I didn’t expect, which I’m putting down to a disturbed inlet cable until a cleaner retest says otherwise (next time the plug comes out of the wall socket, not the UPS).
The other lesson: this UPS runs off two large external car batteries rather than its small internal one, and its firmware doesn’t know. Its charge and runtime estimates are calibrated for the internal battery, so they read nonsensically low and could trigger an early shutdown. Battery voltage is the number to trust, so that’s what I watch, with the 20-minute timer as the primary trigger and the firmware’s low-battery call as a backstop.
A Lab of Its Own
The one piece purely for learning rather than running the house is a small Windows domain controller on its own isolated segment, there to practice the enterprise directory administration that doesn’t otherwise come up in a homelab.
Getting it running meant detours. The virtualized hardware needed extra drivers just to see its disk during setup, and matching the exact driver to the exact virtual controller took trial and error, since the installer gives no hint about what it wanted. The installation media mattered too: one official build only offers the lean, no-desktop edition, which I discovered after installing it and finding no graphical interface waiting. A second attempt with the right installer got the full desktop experience.
The lab got its own dedicated segment, routed through every hop between the router and the server, and a switch sitting in the middle of that path needs explicit configuration too, not just the router at one end. For now that segment can freely reach the rest of the home network while I set things up. The plan is to lock it down to one specific kind of remote access once the lab is stable.
Getting the server to agree on the time with the rest of the house was its own small investigation. A new rule to allow the traffic looked right but sat after another rule that silently dropped the same traffic first. The same category of mistake had bitten another part of this project earlier, which made it faster to spot the second time.
A small win: remote desktop into the domain controller used to greet me with a self-signed certificate warning every time. Rather than build an internal certificate authority for one server, I reused the wildcard certificate that already covers the house, exported it in the format Windows wants, bound it to the RDP listener and added an internal-only DNS name. Now it connects with no warning. (A proper internal CA is still on the list for when a second machine joins the domain.)
A Front Door for Everything Else
With a domain controller, a router, a NAS and a hypervisor all wanting admin access, the next question is who gets in, how, and what’s on the record afterwards. I wanted to try a proper privileged-access-management setup and chose JumpServer, an open-source bastion host, over Teleport. They cover much the same ground, so one was enough to learn from.
A few decisions shaped it:
- It lives on the management network, not the lab one. Beside the Windows lab, it would be useless whenever I power the lab down, and I want it for the Macs and the infrastructure too.
- A VM, not a container, because it’s a multi-container stack of its own.
- Local accounts first, with MFA, so getting in doesn’t depend on the domain controller being up. Directory login can come later.
- Narrow firewall rules, allowing the bastion to reach the domain controller only on the ports it needs. This time they went in above the management-plane drop on the first attempt, having been bitten by that twice before.
The free edition can’t do native RDP or database proxying, but browser-based RDP works, and that was enough: log in to the web console, click the server and a Windows desktop opens in the tab. What sold me is that every session is recorded and can be replayed, which is what you want from the access point to important machines. A few small snags (a hostname allow-list setting, an Ansible helper image that had to be pulled before connectivity checks would run, and a terms-of-use screen that hides everything until you accept it) were each solved in minutes once named. It sits behind the same wildcard certificate as everything else, so the console loads with no warning.
What Broke Along the Way
Not everything worked on the first try, and that’s the more interesting part of the story. A few highlights:
- A dashboard panel that showed “no data” for my VMs turned out to be two stacked bugs: a template variable that silently broke on its “All” option, and a query still referencing a field that no longer existed in the current version of the data. I only found the second by going back to the raw data source to see which fields actually existed. The “hidden” query flag left over from how the panel was first built then became obvious.
- A Wazuh alert about a suspicious hidden network port turned out, after checking from every angle, to be a coincidental digit match in unrelated log timestamps. Verifying an alert is worth the ten minutes, rather than either panicking or dismissing it.
- A kernel-level CVE flagged Critical on one VM affected a hardware driver that VM doesn’t use, since it runs on virtual networking rather than hardware passthrough. Context and actual exposure matter as much as the raw score.
- A thermal surprise. A 10GBase-T SFP+ copper module ran hot enough in a fanless enclosure to fail intermittently, while a cheaper, purpose-built alternative handled the same job without trouble. “More expensive” and “better suited to the job” aren’t the same thing.
- Tailscale looked healthy but half the network was unreachable. The tunnel itself was fine, and Tailscale’s own health check named the problem outright: the box acting as subnet router had forwarding disabled at the kernel level, so tunneled traffic arrived and went nowhere. One
sysctlchange fixed it. Read Tailscale’s diagnostics literally; it usually already knows what’s wrong. - The trickiest one: a service that loaded instantly from one part of the network took six-plus seconds from another, every time. I ruled out DNS, certificate checks, MTU mismatches and the service itself one by one, and eventually caught the packet loss in a live capture. The fix that stuck wasn’t a protocol tweak: I reached the service by its most direct path instead of through an extra hop. Sometimes the simple workaround beats fully explaining the mystery.
- Certificates were less about the certificate than about each app trusting the proxy in front of it. One dashboard stayed stuck on its login screen because its always-on connection needed a couple of specific headers the proxy wasn’t sending. Home Assistant was fussier: it refuses any request through a proxy until told which upstream address to trust, and separately refuses a hostname it doesn’t recognize as its own. Each check produces a different, equally unhelpful error, and both have to be satisfied before anything loads.
- Small papercuts. Editing a config file through a bare recovery console, with no copy-paste, no text editor and every multi-line command at risk of arriving corrupted, turned a two-line change into a long back-and-forth of “read the file back, see what actually landed, adjust”. None of it needed deep expertise, only patience and the habit of verifying every step by reading the result back.
What’s Left
The “not yet done” list is still healthy:
- Tightening the bastion: MFA-required logins, clipboard and file-transfer limits, shipping its audit logs to the SIEM, and adding the rest of the infrastructure as assets.
- A retest of the power-cut path with proper battery measurements.
- A RouterOS sandbox VM alongside the Windows AD lab.
- Automating certificate renewal onto the services that can’t use the reverse proxy.
- Bringing a remote site into the Tailscale network, with its own local Chrony instance and a small Raspberry Pi as an offsite backup target, pulling copies of important data home over the private link.
I also tried migrating the free wildcard certificate onto the WPA3-Enterprise WiFi authentication, and learned that the “do you trust this certificate?” prompt on enterprise WiFi isn’t about certificate validity. It appears once per device by design, however trustworthy the certificate is. Still a real improvement over the old setup, just not the “no prompts, ever” outcome I was hoping for.
Closing Thoughts
None of this was strictly necessary. But there’s something satisfying about owning your infrastructure end to end: knowing what’s running and why, and having the tools to watch it happen instead of trusting a black box. Dzua isn’t finished, and I don’t think projects like this ever are. But it’s in a good place, and it’s mine.